Entertainment
Explore Programs at Fusion Gymnastics Center

Fusion Gymnastics Center is more than just a place to practice sports, it is a hub for developing well-rounded athletes who excel not only in gymnastics but also in everyday life.
The center is committed to providing high-quality training across a range of sports, with experienced coaches who truly care about helping each child reach their potential.
Whether your child is just beginning their journey in sports or is aiming to compete at a higher level, Fusion has a program that fits their needs.
The center offers several programs, from toddler gymnastics classes to intense training for competitive athletes. This flexibility ensures that children of all ages and skill levels can find something that challenges them while also being fun.
Preschool Gymnastics Program
The Preschool Gymnastics program at Fusion is designed specifically for young children between the ages of 18 months and 4.5 years. This program is an excellent way for toddlers to begin developing their motor skills, flexibility, and hand-eye coordination.
It is structured to provide a fun and playful environment where children can engage in activities that encourage physical activity while introducing them to basic gymnastics movements.
Each session is 45 minutes long and incorporates games and exercises that not only improve physical skills but also help children learn how to interact socially.
The focus is on building confidence and ensuring that children have a positive experience while developing essential athletic skills that will serve them well as they grow.
Recreational Gymnastics
The recreational gymnastics program at Fusion is ideal for children who enjoy gymnastics but may not be interested in competing. These classes offer a balanced mix of learning new skills and having fun while improving overall fitness.
Students in this program will work on basic gymnastics skills, such as balance, coordination, flexibility, and strength.
The classes are divided by age group, and each child is encouraged to work at their own pace. Whether your child is a beginner or has some experience in gymnastics, this program provides an excellent foundation for further development.
Competitive Gymnastics Program
For children who wish to take their gymnastics skills to the next level, Fusion Gymnastics Center offers a competitive gymnastics program. This program is designed for athletes who want to train rigorously and compete in local, regional, or even national events.
Gymnasts in the competitive program receive specialized training in all aspects of gymnastics, including vaulting, uneven bars, balance beam, and floor exercises.
They also develop strength, flexibility, and discipline necessary for success at higher levels of competition. The coaches provide tailored training plans to help each gymnast reach their full potential.
Tumbling Classes
Tumbling is an exciting and dynamic program offered at Fusion Gymnastics Center. This class is perfect for athletes who want to work on their acrobatic skills, including flips, cartwheels, and other advanced movements.
Tumbling helps improve balance, coordination, and body control while also being a fun and energetic workout.
Whether your child is a beginner or has experience in gymnastics, the tumbling classes are designed to progress at a pace that suits their current skill level. Students learn techniques that will help them improve their agility and strength while working on their acrobatic abilities.
Ninja Program
The Ninja Program at Fusion Gymnastics Center is one of the most popular and exciting offerings. This program is designed for children who enjoy obstacle courses and physical challenges. Ninja classes combine gymnastics, tumbling, and parkour, allowing students to work on strength, speed, and agility.
The Ninja Program is a great way for kids to develop functional strength and coordination while having fun navigating different obstacles. It helps children gain confidence as they conquer different physical challenges, making it a fantastic choice for kids who love adventure and active play.
Cheerleading Program
Fusion Gymnastics Center also offers a comprehensive cheerleading program. This program focuses on teaching children the basics of cheerleading, including stunts, jumps, tumbling, and dance routines. Students learn how to work as a team, develop confidence, and build strength and flexibility.
Cheerleading is not only about athletic performance but also about encouraging a positive attitude, leadership skills, and teamwork. Whether your child is interested in cheering for their school team or pursuing cheerleading at a competitive level, Fusion provides an excellent environment for growth and development.
Fusion After School Training
The After School Training program at Fusion Gymnastics Center is designed for children who need a fun and active way to spend their after-school hours.
This program offers a safe and engaging environment where kids can participate in various physical activities, including gymnastics, tumbling, and ninja training. It is a great way for children to stay active and continue developing their athletic skills after school.
The After School Training program is ideal for busy families who want their children to engage in physical activity outside of regular school hours. It helps children build strength, coordination, and fitness while providing a structured and supervised environment.
Camps and Birthday Parties
In addition to regular classes, Fusion Gymnastics Center also offers a range of camps throughout the year. These camps provide children with an opportunity to immerse themselves in gymnastics and other athletic activities while having fun and making new friends. The camps cater to children of all skill levels, from beginners to advanced athletes.
Fusion also offers birthday party packages, allowing children to celebrate their special day with gymnastics-themed fun. These parties are designed to be exciting and memorable, with a variety of games and activities to keep the kids entertained.
Entertainment
8093642079 Scam Alert: 7 Costly Traps You Must Avoid Now

The number 8093642079 has recently become associated with multiple scam reports across various regions. Many people have reported receiving calls from this number that attempt to extract personal information or trick users into sending money. It is crucial to understand the risks involved with such calls and how scammers operate. Fraudsters use sophisticated techniques to appear legitimate, often impersonating government agencies, banks, or well-known companies. These scams can lead to significant financial loss, identity theft, and long-term complications. Being aware of the tactics used by the operators behind 8093642079 is the first step in protecting yourself and your loved ones from falling victim to such schemes.
How 8093642079 Scams Typically Work
Scammers using the number 8093642079 often employ psychological tactics to pressure their targets into acting quickly. They might claim that your bank account has suspicious activity, threaten legal action, or offer fake rewards. Many victims report that these calls are persistent, sometimes occurring multiple times in a single day. The main goal of the scam is to manipulate victims into sharing sensitive information such as social security numbers, bank account details, or login credentials. Some scams may even instruct victims to install suspicious software or transfer funds under the guise of verifying identity. Understanding the common methods used by scammers can help you avoid becoming a victim.
Identifying the Warning Signs
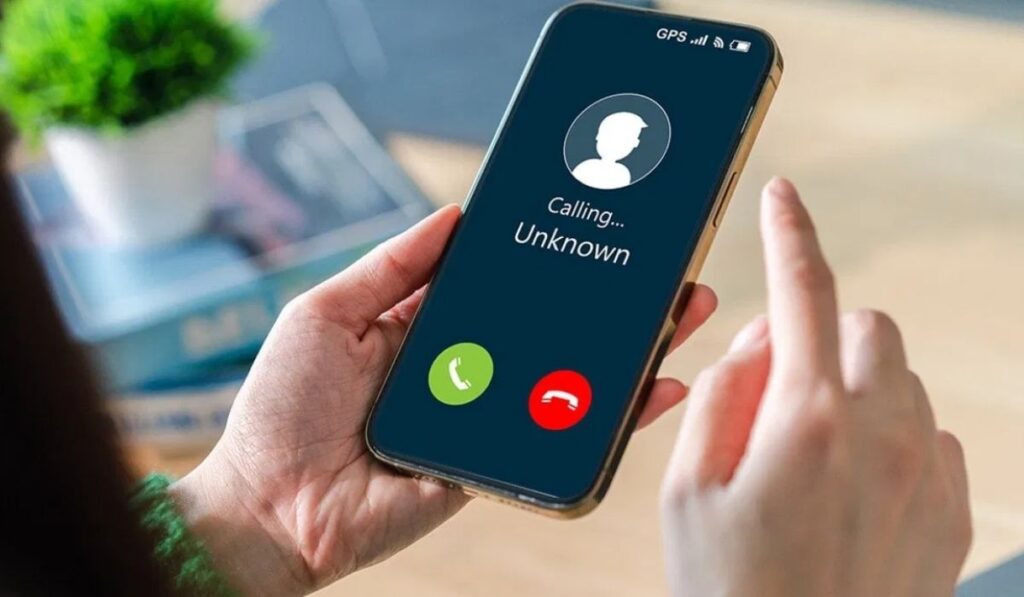
Detecting a call from 8093642079 as a potential scam is crucial. There are several warning signs that can alert you to fraudulent activity. High-pressure tactics, demands for immediate payment, and requests for personal information over the phone are clear red flags. Additionally, genuine organizations never ask for sensitive details through unsolicited calls. If you notice inconsistencies in the caller’s tone or story, it is likely a scam. Keeping a record of suspicious calls and cross-verifying information through official channels can help prevent falling into traps set by those behind.
The Impact on Victims
Victims of scams associated with 8093642079 often experience severe financial and emotional consequences. Many report losing substantial amounts of money after following fraudulent instructions. Beyond financial loss, these scams can also damage one’s credit, result in identity theft, and cause significant stress and anxiety. The psychological effects of being targeted by persistent scammers can be long-lasting, leaving individuals feeling violated and vulnerable. Families and businesses are also affected, as scammers often attempt to exploit multiple individuals connected to a single victim. Recognizing the impact can reinforce the importance of staying vigilant against scams.
Preventative Measures to Protect Yourself

Protecting yourself from scams linked to 8093642079 requires proactive steps. First, never share personal or financial information with unknown callers. Registering your number on official do-not-call lists can reduce unwanted calls. Additionally, installing call-blocking apps and maintaining updated antivirus software can prevent malicious attempts to access your devices. Educating yourself and your family about common tactics used by scammers is essential. By taking these preventive measures, you reduce the chances of falling victim to the schemes perpetrated by those operating through.
Reporting 8093642079 Incidents
If you receive suspicious calls from 8093642079, it is important to report them to relevant authorities. Many countries have dedicated organizations that handle phone fraud and consumer protection. Reporting incidents helps authorities track scammers, prevent future scams, and warn other potential victims. When reporting, provide as much detail as possible, including the time of the call, the content of the conversation, and any numbers or email addresses provided by the caller. Your reports contribute to broader efforts to curb scams and protect communities from-related fraud.
Real-Life Experiences from Victims

Many individuals have shared firsthand experiences with 8093642079 scams. These stories highlight how convincing and manipulative the scammers can be. Victims often report receiving threats of legal action, urgent requests for payments, and fake promises of rewards. Some recount being contacted multiple times in a short period, which creates a sense of panic and urgency. Learning from these experiences can help others recognize warning signs early and avoid costly mistakes. Real-life accounts emphasize the need for awareness and caution when dealing with unknown numbers like 8093642079.
Common Techniques Used by Scammers
The operators behind 8093642079 use a variety of techniques to deceive victims. They often spoof legitimate numbers to make calls appear trustworthy. Some use automated messages to impersonate official entities, while others rely on persuasive scripts to extract personal information. Scammers are constantly evolving their methods, making it essential for the public to stay informed. Familiarizing yourself with these techniques and questioning unsolicited calls can prevent financial loss and identity theft. Awareness of how 8093642079 scams function is a critical tool in safeguarding your personal and financial security.
How Technology Can Help You Stay Safe

Technology offers several tools to combat scams associated with 8093642079. Call-blocking apps, spam filters, and reporting software can reduce the frequency of fraudulent calls. Many devices allow users to automatically reject unknown numbers or flag suspicious activity. Additionally, educational resources available online provide up-to-date information about ongoing scams. Utilizing these technological solutions alongside vigilant personal practices significantly lowers the risk of falling victim to 8093642079 scams. Staying informed and leveraging technology empowers individuals to maintain control over their privacy and security.
Conclusion: Staying Vigilant Against 8093642079
The rise of scams linked to 8093642079 underscores the importance of vigilance in today’s digital and telecommunication environment. By understanding the risks, recognizing warning signs, and taking preventative measures, individuals can protect themselves and their families from financial loss and identity theft. Staying informed about real-life experiences, common techniques used by scammers, and available technological tools enhances personal safety. Reporting suspicious calls not only safeguards you but also contributes to broader community protection efforts. Awareness and proactive action remain the most effective strategies to avoid falling victim to scams associated with 8093642079.
Frequently Asked Questions
1. What is 8093642079?
- It is a phone number linked to reported scams and fraudulent activity.
2. How can I identify calls from 8093642079?
- Look for urgent demands, threats, or requests for personal information.
3. Is it safe to call back 8093642079?
- No, calling back may expose you to scams or additional calls.
4. How do I report 8093642079?
- Contact local authorities or consumer protection agencies.
5. Can technology block 8093642079 calls?
- Yes, using call-blocking apps or spam filters can prevent these calls.
Entertainment
Tronics ORUL1108 Review: 7 Powerful Reasons This Smart Device Is Revolutionizing Circuit Testing
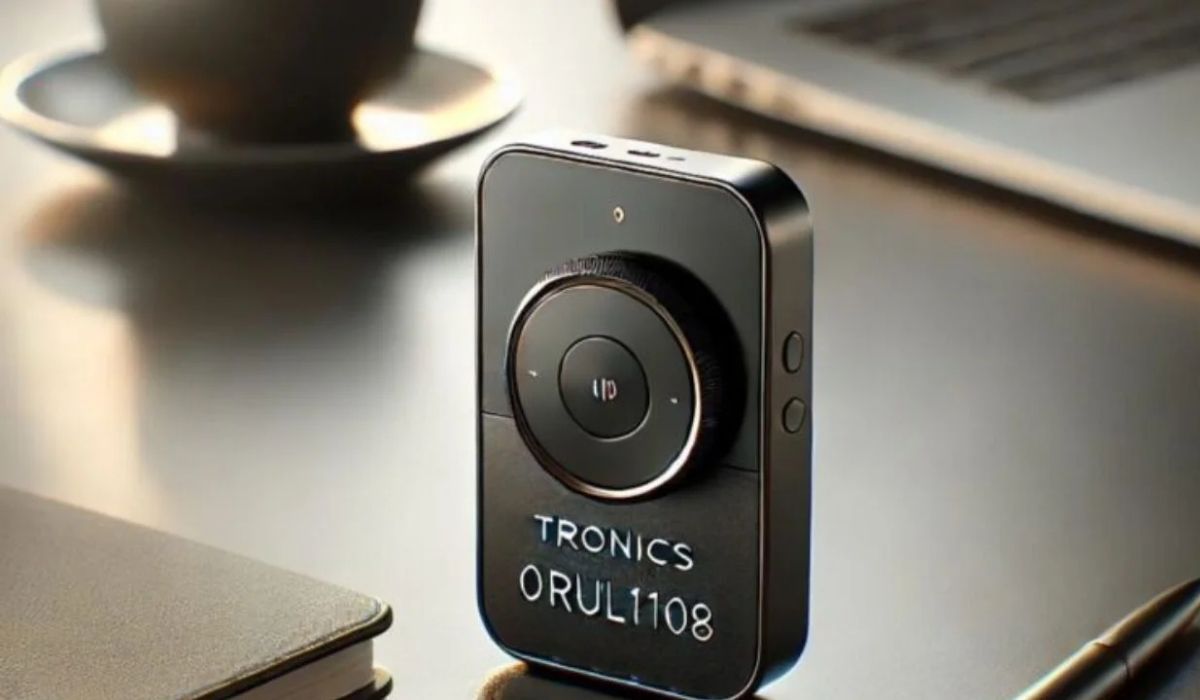
The Tronics ORUL1108 has emerged as one of the most innovative tools for circuit testing and electrical diagnostics. Professionals in electronics, engineering, and DIY enthusiasts are increasingly turning to this smart device for its reliability and multifunctional capabilities. Unlike traditional testers, the Tronics ORUL1108 integrates advanced sensing technology, providing accurate and swift results that save both time and effort. Its ergonomic design makes it easy to handle, while the intuitive interface allows even beginners to operate it efficiently. The device’s compatibility with various circuits, from household wiring to complex industrial systems, makes it an indispensable tool for anyone involved in electronics.
Advanced Features of Tronics ORUL1108
The Tronics ORUL1108 comes equipped with several advanced features that distinguish it from conventional testing tools. It includes a multifunctional probe system capable of measuring voltage, resistance, and continuity with high precision. The device also features a real-time display that visually represents circuit conditions, making troubleshooting easier and more intuitive. Additionally, its automatic calibration system ensures that readings are always accurate, eliminating errors that can occur with manual adjustments. These features collectively make the Tronics ORUL1108 a comprehensive solution for both professional technicians and hobbyists.
Accuracy and Reliability in Circuit Testing

One of the most significant advantages of the Tronics ORUL1108 is its exceptional accuracy. Traditional testing methods can often produce inconsistent results due to human error or equipment limitations. The Tronics ORUL1108, however, leverages smart sensing algorithms to provide consistent readings under various conditions. Its reliability extends to both low and high-voltage applications, ensuring that users can trust the results regardless of the circuit type. For engineers who require precise data for designing or repairing electrical systems, this device proves indispensable. Its accuracy reduces the risk of circuit damage and improves overall efficiency.
User-Friendly Interface and Design
The design of the Tronics ORUL1108 prioritizes usability without compromising on functionality. Its compact size allows users to maneuver in tight spaces, and the well-lit display ensures readability even in low-light conditions. The buttons are logically arranged for quick access, and the interface provides immediate feedback on circuit status. This ease of use makes it suitable for a wide range of users, from students learning electronics to seasoned professionals. Additionally, the lightweight design reduces fatigue during prolonged usage, which is crucial for technicians working on complex or multiple circuits.
Time-Saving Capabilities

Efficiency is a key benefit of using the Tronics ORUL1108. Traditional testing often requires multiple tools and repetitive procedures to verify circuit integrity. This device consolidates several functions into one, enabling users to perform comprehensive tests without switching between instruments. Its fast response time ensures that measurements are delivered almost instantaneously, allowing technicians to identify faults quickly. The Tronics ORUL1108 reduces downtime during troubleshooting, making it a valuable asset for both industrial and home applications. Users can complete tasks faster, which translates into higher productivity and reduced operational costs.
Safety Features of Tronics ORUL1108
Safety is paramount in electrical testing, and the Tronics ORUL1108 addresses this concern effectively. The device includes overvoltage protection to prevent damage to both the tool and the user. Its insulated probes minimize the risk of accidental shocks, and the automatic shutoff function conserves battery life while maintaining safety. Furthermore, the device is designed to handle high-current circuits without compromising performance, ensuring that users can operate it in various environments safely. These safety features make it suitable for both professional workshops and home projects, where safety cannot be compromised.
Compatibility and Versatility

Another reason why the Tronics ORUL1108 is gaining popularity is its versatility. It can be used with different types of circuits, including AC and DC systems, automotive wiring, and electronic boards. Its adaptable probes and wide measurement range make it compatible with both simple and complex setups. Users appreciate the flexibility that the Tronics ORUL1108 offers, allowing them to switch between tasks without needing additional tools. Whether testing residential wiring or diagnosing industrial equipment, this device adapts seamlessly to various scenarios, making it a multifunctional solution for circuit testing.
Durability and Build Quality
Durability is a critical consideration for any electronic testing device, and the Tronics ORUL1108 excels in this aspect. Constructed with high-quality materials, it withstands frequent use and exposure to challenging environments. The casing protects internal components from shocks and dust, ensuring longevity even with rigorous usage. Its robust design reassures users that the device can handle demanding tasks without compromising performance. Investing in the Tronics ORUL1108 means acquiring a reliable tool that will serve for years, reducing the need for frequent replacements and repairs.
Learning Curve and Support

While the Tronics ORUL1108 is advanced, it is designed to minimize the learning curve. Clear instructions, an intuitive interface, and online support resources make it accessible to new users. Many electronics educators recommend this device for teaching practical circuit testing, as it allows students to understand electrical principles quickly. Additionally, the manufacturer provides customer support and troubleshooting guidance, ensuring that users can maximize the device’s potential. This combination of simplicity and support contributes to a positive user experience, making the Tronics ORUL1108 both efficient and user-friendly.
Value for Money
Considering its features, accuracy, safety, and versatility, the Tronics ORUL1108 offers excellent value for money. Users benefit from a single device that performs multiple functions, reducing the need to purchase separate tools. Its durability further enhances cost-effectiveness, as it is built to last for years of regular use. Professionals and hobbyists alike find that the investment in a Tronics ORUL1108 pays off through improved efficiency, reliable results, and safer testing practices. The device sets a benchmark for modern circuit testers, combining innovation, practicality, and affordability in one compact package.
Conclusion
The Tronics ORUL1108 represents a significant advancement in circuit testing technology. Its combination of accuracy, user-friendly design, safety, versatility, and durability makes it a must-have tool for anyone working with electronics. From students learning the fundamentals to professionals performing complex diagnostics, the device offers clear advantages over traditional methods. The Tronics ORUL1108 is not just a tool; it is a smart assistant that revolutionizes how circuits are tested, ensuring reliability, safety, and efficiency at every step. Embracing this technology can transform the way electrical work is approached, making tasks faster, safer, and more precise.
Frequently Asked Questions
1. What is the Tronics ORUL1108 used for?
- It is used for testing and diagnosing electrical circuits accurately and efficiently.
2. Is Tronics ORUL1108 suitable for beginners?
- Yes, its intuitive design and interface make it beginner-friendly.
3. Can Tronics ORUL1108 handle high voltage circuits?
- Yes, it is equipped with safety features for high voltage applications.
4. Does Tronics ORUL1108 require calibration?
- No, it has an automatic calibration system for accurate readings.
5. What types of circuits can be tested with Tronics ORUL1108?
- It works with AC, DC, automotive, and electronic board circuits.
NEWS
ReaperScans Shutdown Explained: Why Fans Loved It & What to Use Now
ReaperScans was one of the most popular platforms for manga and manhwa readers. Known for its user-friendly interface, high-quality translations, and fast updates, ReaperScans attracted a loyal fanbase that relied on the site for content that was not always accessible elsewhere. Readers appreciated the consistency and dedication of ReaperScans in delivering chapters on time, which helped it stand out in a crowded market. The sudden shutdown of ReaperScans left many fans confused and searching for explanations, making its disappearance a significant event in the online manga community.
Why ReaperScans Became Popular
The platform’s popularity was built on several key factors. ReaperScans emphasized accuracy in translations, ensuring that the original tone and story of each series were preserved. Unlike automated or low-quality translations, ReaperScans focused on providing content that was readable and enjoyable. Its organized layout and minimal distractions made reading chapters effortless, which further contributed to its reputation. Fans not only relied on the site for reading but also trusted it as a consistent source for ongoing series, making it a staple for manga enthusiasts worldwide.
Understanding the Shutdown of ReaperScans
The closure of ReaperScans can be attributed to common challenges faced by scanlation groups, including legal pressure, copyright issues, and operational difficulties. Although the platform did not provide detailed explanations for its shutdown, it is reasonable to assume that multiple factors influenced the decision. The disappearance of ReaperScans was more than just a website closing—it was the loss of a community hub where fans could interact, discuss series, and share recommendations. The shutdown highlighted the fragile nature of fan-driven platforms in the digital entertainment space.
The Legacy of ReaperScans

Even though ReaperScans is no longer active, its impact continues to resonate within the manga and manhwa community. The site set high standards for translation quality, update speed, and reader engagement. Many readers remember the clean interface, organized chapters, and the reliability that ReaperScans offered. Its legacy is evident in the practices of other scanlation groups and platforms, which often model their approach on the strategies used by ReaperScans to maintain audience satisfaction and loyalty.
The Community Aspect of ReaperScans
One of the most cherished aspects of ReaperScans was its focus on community engagement. Readers could comment on chapters, participate in forums, and interact on social media channels. This sense of belonging and connection made the platform more than just a reading site; it became a social hub for fans of manga and manhwa. The shutdown of ReaperScans left a void for those who had formed friendships and built communities around the shared love for series, underscoring the importance of interaction in online fan spaces.
Technology and User Experience

ReaperScans was also recognized for its technological advantages. The website was fast, responsive, and easy to navigate. Readers appreciated the minimalist design that prioritized content over ads and clutter. Chapters loaded quickly, and the interface allowed users to find and read series effortlessly. By combining technical efficiency with high-quality translations, ReaperScans provided a seamless experience that few other platforms could match. This attention to user experience helped the platform maintain a large and engaged audience over time.
Alternatives After the Shutdown
With ReaperScans no longer available, fans turned to other platforms for their reading needs. Legal manga and manhwa sites, as well as alternative scanlation groups, have stepped in to fill the gap. While the transition may take time for users accustomed to ReaperScans’ interface, the lessons learned from the platform—emphasizing translation quality, frequent updates, and user engagement—can guide readers in choosing the best alternatives. The closure also encouraged fans to explore official platforms, ensuring access to licensed and properly maintained content.
Global Accessibility and Impact

ReaperScans contributed significantly to making manga and manhwa accessible to readers worldwide. Many series were unavailable in multiple languages, and ReaperScans bridged that gap with accurate and timely translations. Fans from different countries could enjoy the same chapters simultaneously, creating a shared experience that was unique to the platform. Its impact extended beyond individual readers, influencing the international community of manga enthusiasts and shaping expectations for quality and accessibility in online reading platforms.
Lessons from ReaperScans
The story of ReaperScans offers important lessons for both readers and future scanlation groups. Its success highlighted the importance of balancing translation quality, update speed, and community interaction. Future platforms aiming to replicate ReaperScans’ success must focus on these elements to maintain loyal readership. Additionally, the shutdown reminds fans to support legal content whenever possible, as operational and legal challenges can disrupt access to fan-driven platforms like ReaperScans.
Conclusion: The Enduring Influence of ReaperScans

While ReaperScans has officially shut down, its influence continues to shape the manga and manhwa community. The platform’s focus on quality translations, reader engagement, and fast updates set a standard for other sites. For fans, the memories and experiences associated with ReaperScans remain valuable, serving as a benchmark for what a well-run scanlation site can achieve. Though the platform is gone, the legacy of ReaperScans ensures that its contributions to the world of manga will not be forgotten.
Frequently Asked Questions
- What happened to ReaperScans
- ReaperScans shut down due to operational and legal challenges.
- Why was ReaperScans popular
- It offered high-quality translations, fast updates, and a strong community focus.
- Are there alternatives to ReaperScans
- Yes, legal manga platforms and other scanlation groups serve as replacements.
- Can I still find ReaperScans content online
- Some chapters may exist in archives, but the site is officially closed.
- Did ReaperScans impact the manga community
- Yes, it set high standards for translations, updates, and community engagement.
-

 Business21 hours ago
Bardoek Explained: From Traditional Roots to Today
-

 Business21 hours ago
EuroYungs com Breakdown: Facts, Features, and the Real User Verdict
-

 Business21 hours ago
Norfolk Southern Mainframe: Unseen Power Driving Modern Transportation Efficiency
-

 Business21 hours ago
Falrx com Guide – What It Is, Topics, Safety Tips
-

 Business21 hours ago
Antolohe: The Undiscovered Paradise Blending Culture, History, and Adventure


